Blogger gadgets to appear on homepage or single post
Your Blogger blog is very slow to load? Usually the problem caused by excessive
gadgets installed at your blog homepage. If you love your gadgets so much and
don’t want to eliminate some of them, you can arrange it properly, either to
show up on the homepage or on a single post.
Here are the quick steps:
Blogger gadget on a homepage
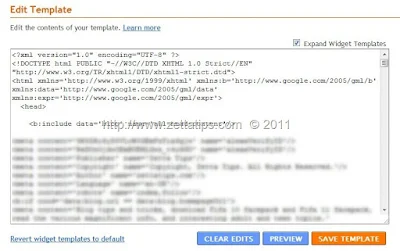
1. You need to go to Design, click Edit HTML on your blogger dashboard, and tick Expand Widget template. Before you proceed further, backup your template first by “Download Full Template." This step is highly recommended.
2. Search your gadget’s name by pressing ctrl + f on your keyboard on
your browser. Then add these two codes in between your gadget codes.
Blogger gadget on a single post
1. Go to Design, click Edit HTML on your blogger dashboard and tick Expand Widget template. Before you proceed further, backup your template first by “Download Full Template”.
Here are the quick steps:
Blogger gadget on a homepage
1. You need to go to Design, click Edit HTML on your blogger dashboard, and tick Expand Widget template. Before you proceed further, backup your template first by “Download Full Template." This step is highly recommended.
<b:widget id='HTML1' locked='false' title='' type='HTML'>

<b:includable id='main'>

<b:if cond='data:blog.url == data:blog.homepageUrl'>

<!-- only display title if it's non-empty -->

<b:if cond='data:title != ""'>

<h2 class='title'><data:title/></h2>

</b:if>

<div class='widget-content'>

<data:content/>

</div>

</b:if>
Blogger gadget on a single post
1. Go to Design, click Edit HTML on your blogger dashboard and tick Expand Widget template. Before you proceed further, backup your template first by “Download Full Template”.
2. Search your gadget’s name by pressing ctrl + f on your keyboard on
your browser. Then add these two codes in between your gadget codes.
3. Save your template and view your blog. Navigate to your homepage, then to single blog post to see the result. In conclusion, if you want to revert back to your original template just restore the template that you have downloaded or simply remove the codes that you have added before. This trick definitely works for any gadget, including ads!!! If you want to interchange your ads, then this tutorial will help you.
<b:widget id='HTML2' locked='false' title='' type='HTML'>

<b:includable id='main'>

<b:if cond='data:blog.pageType == "item"'>

<!-- only display title if it's non-empty -->

<b:if cond='data:title != ""'>

<h2 class='title'><data:title/></h2>

</b:if>

<div class='widget-content'>

<data:content/>

</div>

</b:if>
3. Save your template and view your blog. Navigate to your homepage, then to single blog post to see the result. In conclusion, if you want to revert back to your original template just restore the template that you have downloaded or simply remove the codes that you have added before. This trick definitely works for any gadget, including ads!!! If you want to interchange your ads, then this tutorial will help you.


Leave a Comment